搭建github个人博客----免费、无限流量
写在前面的话:有时候我们需要一个地方可以作为个人博客,可是因此去买服务器又觉得不划算,找免费空间呢,又常常需要隔一段时间就帮空间网站推广换取续费。这时候就想如果有个地方可以给自己作为个人博客使用,又不需要付费或者维护就好了。嗯,现在就有。
前提:已安装node,git
一、申请一个github账号,用户名,如:katherine0325
二、新建一个仓库,名字为katherine0325.github.io,前面必须是你的用户名,比如说我的用户名是katherine0325,那么我的仓库名必须是katherine0325.github.io
三、本地新建一个文件夹:取个名字:如,blog
四、新建一个index.html文件 /blog index.html文件(名字必须是index.html) 然后是一个基本的html文件框架
<!DOCTYPE html>
<html lang="en">
<head>
    <meta charset="UTF-8">
    <meta name="viewport" content="width=device-width, initial-scale=1.0">
    <meta http-equiv="X-UA-Compatible" content="ie=edge">
    <title>Document</title>
</head>
<body>
    <div>随便写点儿什么</div>
</body>
</html>
然后再创建一个文件 README.md(不能是别的文件名,而且必须有这个文件,如果没有,你的仓库可能无法顺利地展示到博客地址上) 这个文件是用于说明你应用的大概情况的,里面的内容随便写点儿什么。
五、创建仓库 /blog 调出git(还不会使用git点击这里)
git init //创建仓库

git status //查看当前状态

git add . //将所有的文件添加到缓存区

git commit -m "." //提交文件。tips:-m是指提交时的备注 双引号内是备注内容

git remote add origin https://github.com/katherine0325/katherine0325.github.io.git
还记得刚才创建仓库的时候的仓库地址吗,对,就是把那个放上去。当然,如果你已经忘记地址了,也可以在这里找到:
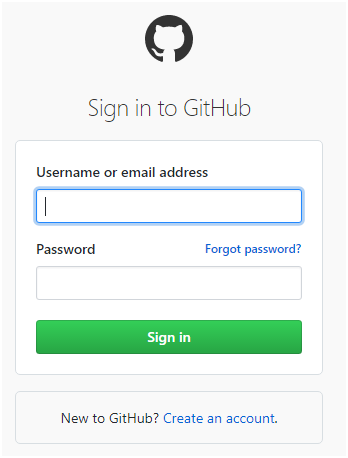
https://github.com/ 来到github
右上角 sign in登陆你的账号
然后右下角
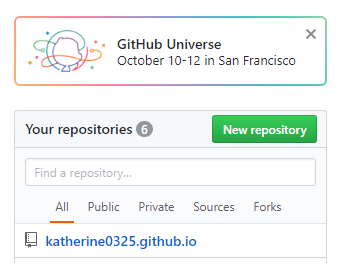
点击你的仓库名称
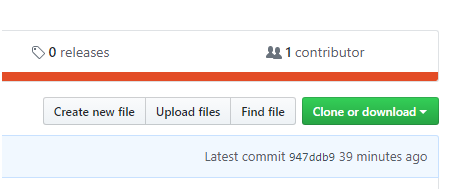
点击右边clone or download
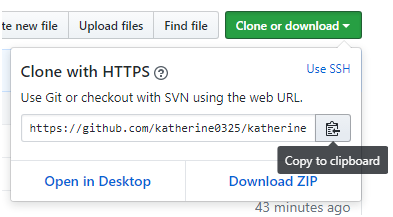
复制这个地址
继续git 添加关联的地址之后
git push origin master //将内容推送到github仓库上。
六、完成
打开地址 katherine0325.github.io
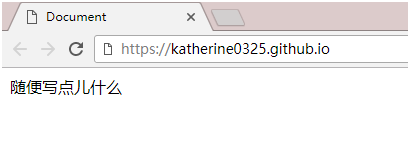
可以看到刚才写的网页内容已经在这个地址上了。
当然还没有结束,毕竟你也不是真的仅仅想要一个由一个html组成的静态页面。想要相对复杂的页面展示,想要可以复用的组件,想要自动拉去写的博客内容,而不是写一篇博客就来改一次页面代码
这么多要求也有点儿太吹毛求疵了吧~~
OK,满足你
接下来我们就学习如何使用react写一个可以复用组件的,通过拉取github issue为博客内容的,静态博客。
来,我们先安装一个create-react-app,右键打开一个git bash
npm install create-react-app -g
然后,利用create-react-app这个脚手架自动生成一个基本的应用框架
create-react-app gitblog
进入文件夹gitblog
我们打开package.json这个文件,这个文件是这个应用的配置文件,"script"下有:
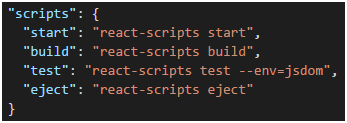
说明的是,当npm运行不同的情况的时候,运行的具体内容,其中start是开发阶段使用的,build是完成应用后,构建阶段用的。
现在我们回到/gitblog文件夹,右键打开git bash窗口
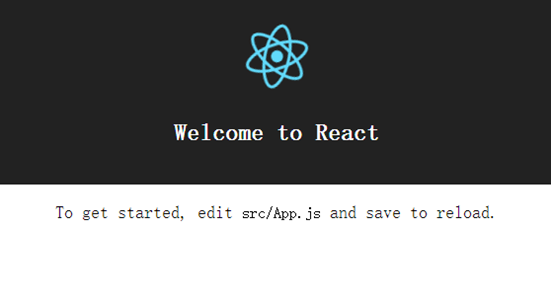
npm start
网页会自动打开地址 http://localhost:3000
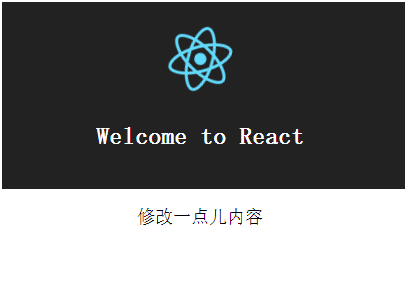
打开 /src/App.js 修改一点儿内容
import React, { Component } from 'react';
import logo from 'logo.svg';
import './App.css';

class App extends Component {
    render() {
        return (
            <div className="App">
                <div className="App-header">
                    <img src={logo} className="App-logo" alt="logo" />
                    <h2>Welcome to React</h2>
                </div>
                <p className="App-intro">
                    修改一点儿内容
                </p>
            </div>
        )
    }
}

export default App;
与之对应的页面也出现了内容的改变
我们来模仿一下这个App.js来自己写一个
同样在/src文件夹下,新增/src/New.js
// 首先我们引入react
import React, { Component } from 'react';

// 然后写这个组件
import React, { Component } from 'react';

class New extends Component {  //class后面跟的是自己取得组件名字,名字最好与文件名保持一致
    render() {
        return (  //想要添加的组件可以写在这里面,需要提醒的是,组件里面的内容必须使用一个总体的html标签包裹起来,如果多个的话是不行的,比如:<div>111</div>是正确的,如果:<div>111</div><p>222</p>这样是会报错的,说到这里,大家可以去下载一个vs code,这是一个非常好用的代码编写软件,写代码的时候出现语法错误,它会标写出来。
            <div>新的组件内容</div>
        )
    }
}

// 组件写完之后,应该将其暴露出来
import React, { Component } from 'react'

class New extends Component {
    render() {
        return (
            <div>新的组件内容</div>
        )
    }
}

export default New  //将组件暴露出来
写完一个新的组件之后,我们去把它替换掉App.js,看看我们模仿App.js的成果
/src/index.js
import React from 'react';
import ReactDOM from 'react-dom';
import './index.css';
import New from './New;  //这里把App换成New
import registerServiceWorker from './registerServiceWorker';

ReactDOM.render(<New />, document.getElementById('root'));  //这里把App换成New
registerServiceWorker();
保存后我们来看看我们的网页,已经变成了我们在New里面写的内容
这个时候我们就会发现,似乎我们所有的事情又只能在这个App.js/New.js里面做了,这跟我们就写个html文件有什么区别。
所以按照你做想的,我们开始为了添加多个路由地址而努力吧,除了localhost:3000/之外,我开始想要localhost:3000/new了,哦,不对,在react里面我们应该说,我们想要localhost:3000/#/new了
首先到/gitblog里,我们来安装一个react-router的npm包
npm install react-router@2.8.0 --save
tips:这里,我们需要指定版本号,因为react-router2.8以后的版本有较大的改变,如果这里不指定版本号,我们传统的react-router的写法是无法正常运行的,后面那个--save是用来把这次新增添加到package.json文件里面的,这样你每次npm包的变更都会被记录。其他人在看你的项目的时候,也能够直接的发觉项目有什么依赖。
打开 /src/index.js
import React from 'react';
import ReactDOM from 'react-dom';
import './index.css';
import App from './App';
import registerServiceWorker from './registerServiceWorker';

ReactDOM.render(<App />, document.getElementById('root'));
registerServiceWorker();
我们把路由编辑上去
import React from 'react';
import ReactDOM from 'react-dom';
import { Router, Route, IndexRoute } from 'react-router';  //01.引入react-route
import registerServiceWorker from './registerServiceWorker';

//02.引入相关的组件
import App from './App';
import New from './New';

//03.将相关组件编入路由
var Routes = (
    <Router>
        <Route path="/" component={App} />
        <Route path="/new" component={New} />
    </Router>
)

ReactDOM.render(Routes, document.getElementById('root'));  //04. 把路由放入渲染区域
registerServiceWorker();
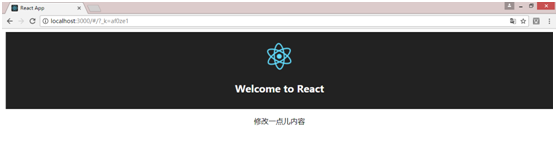
这时候再看我们的网页,已经将我们想要的路由页面展示出来了。tips:路由?号后面的内容不用管它,它只是哈希值
路由已经弄好了,我们来聊一聊可复用的组件的问题,前面的无论是App.js还是New.js都是一个页面的概念,显然一个页面是由很多个组件组成的。 这里,我们打算使用flux框架,来实现我们这次的react的框架,flux框架是facebook官方推荐的react配套框架,现在大热的redux框架我也用过,总结来看我还是偏好flux,普遍认为redux比较轻便,而flux更加适合较为大型的应用,不过我使用的时候,觉得redux有太多没有必要的冗余的状态滞留。
我们在src里新建一个/src/routes/文件夹用来存放页面,
首页我想要放一个导航,一个文章列表和一个页尾。于是我把它取名为Articles:/src/routes/articles 里面要新建文件/src/routes/articles/Articles.js /src/routes/articles/ArticlesActions.js /src/routes/articles/ArticlesStore.js
打开文件/src/routes/articles/Articles.js,我们创建这个文章列表
import React, { Component } from 'react'

class Articles extends Component {
    render() {
        return (
            <ul>
                <li><a>第一篇文章</a></li>
                <li><a>第二篇文章</a></li>
            <ul>
        )
    }
}

export default Articles
然后再去/src/index.js改一下路由
import React from 'react';
import ReactDOM from 'react-dom';
import { Router, Route, IndexRoute } from 'react-router';
import registerServiceWorker from './registerServiceWorker';

import Articles from './routes/articles/Articles';  //01. 改一下引入
import New from './New';

var Routes = (
    <Router>
        <Route path="/" component={Articles} />   //02. 改相关路由
        <Route path="/new" component={New} />
    </Router>
)

ReactDOM.render(Routes, document.getElementById('root'));
registerServiceWorker();
在看一下页面
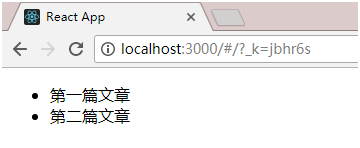
正常
列表有了,我还想做一个导航,可是一想到,别的页面也可能用到这个导航,它不一定是只属于这个页面的,所以我觉得不把它放到/routes更好,新建一个文件夹/src/components/,新建文件/src/components/Nav.js
import React, { Component } from 'react'

class Nav extends Component {
    render() {
        return (
            <nav className="navbar navbar-default">
                <div className="container-fluid">
                    <div className="navbar-header">
                    <button type="button" className="navbar-toggle collapsed" data-toggle="collapse" data-target="#bs-example-navbar-collapse-1">
                        <span className="sr-only">Toggle navigation</span>
                        <span className="icon-bar"></span>
                        <span className="icon-bar"></span>
                        <span className="icon-bar"></span>
                    </button>
                    <a className="navbar-brand" href="" style={{fontFamily:'Microsoft YaHei'}}>
                        <span className={'triangles animated '}>
                        <div className='tri invert'></div>
                        <div className='tri invert'></div>
                        <div className='tri'></div>
                        <div className='tri invert'></div>
                        <div className='tri invert'></div>
                        <div className='tri'></div>
                        <div className='tri invert'></div>
                        <div className='tri'></div>
                        <div className='tri invert'></div>
                        </span>
                        JavaScript技术栈
                    </a>
                    </div>
                    <div className="collapse navbar-collapse" id="bs-example-navbar-collapse-1">
                    <ul className="nav navbar-nav navbar-right">
                        <li>
                            <form className="navbar-form navbar-left" role="search">
                            <div className="input-group">
                                <input type="text" className="form-control" placeholder="文章名称" />
                                <span className="input-group-btn">
                                    <button className="btn btn-default">搜索</button>
                                </span>
                            </div>
                            </form>
                        </li>
                    </ul>
                    </div>
                </div>
            </nav>
        )
    }
}

export default Nav
然后我们把它引入到Articles页面中
/src/routes/articles/Articles.js
import React, { Component } from 'react'

import Nav from '../../components/Nav'  //01. 引入Nav

class Articles extends Component {
    render() {
        return (
            <div>  //02. 外围添加div标签,方便等下添加Nav
                <Nav />  03. 添加导航
                <ul>
                    <li><a>第一篇文章</a></li>
                    <li><a>第二篇文章</a></li>
                </ul>
            </div>  //02. 添加div
        )
    }
}

export default Articles
刷新页面
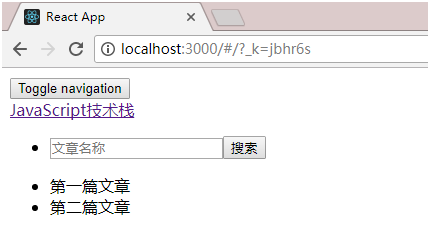
这个时候我们可以看到这个导航页面的长相相当肤浅(呵呵),理由嘛~~,是因为我这边想要使用bootstrap的样式,大家可以看到Nav组件内容编辑的时候 className(tips:react使用的时候用className代替class)里面是包含了相当多的boostrap的className,这时候我们需要引用bootstrap(还不会使用bootstrap的,请点击这里)
引入bootstrap /public/index.html
<!doctype html>
<html lang="en">
  <head>
    <meta charset="utf-8">
    <meta name="viewport" content="width=device-width, initial-scale=1, shrink-to-fit=no">
    <meta name="theme-color" content="#000000">
    <!--
      manifest.json provides metadata used when your web app is added to the
      homescreen on Android. See https://developers.google.com/web/fundamentals/engage-and-retain/web-app-manifest/
    -->
    <link rel="manifest" href="%PUBLIC_URL%/manifest.json">
    <link rel="shortcut icon" href="%PUBLIC_URL%/favicon.ico">
    <link rel="stylesheet" href="https://maxcdn.bootstrapcdn.com/bootstrap/latest/css/bootstrap.min.css"> // 01. 添加bootstrap的css引用
    <!--
      Notice the use of %PUBLIC_URL% in the tags above.
      It will be replaced with the URL of the `public` folder during the build.
      Only files inside the `public` folder can be referenced from the HTML.

      Unlike "/favicon.ico" or "favicon.ico", "%PUBLIC_URL%/favicon.ico" will
      work correctly both with client-side routing and a non-root public URL.
      Learn how to configure a non-root public URL by running `npm run build`.
    -->
    <title>React App</title>
  </head>
  <body>
    <noscript>
      You need to enable JavaScript to run this app.
    </noscript>
    <div id="root"></div>
    <!--
      This HTML file is a template.
      If you open it directly in the browser, you will see an empty page.

      You can add webfonts, meta tags, or analytics to this file.
      The build step will place the bundled scripts into the <body> tag.

      To begin the development, run `npm start` or `yarn start`.
      To create a production bundle, use `npm run build` or `yarn build`.
    -->
  </body>
</html>
再次刷新页面:

没那么肤浅了吧
用同样的方法,再写好Footer.js
/src/components/Footer.js
import React, { Component } from 'react'

class Footer extends Component {
    render() {
        return (
            <footer style={{background: 'rgb(59,63,81)', color: '#fff'}}>
                <div className='container'>
                    <div className='row'>
                        <div className='col-sm-5'>
                            <h3 className='lead'><strong>Information</strong> and <strong>Copyright</strong></h3>
                            <p>Powered by <strong>Node.js</strong>, <strong>create-react-app</strong> and <strong>React</strong> with Flux architecture.</p>
                            <p>You may view the <a href='https://katherine0325.github.io'>Source Code</a> behind this project on GitHub.</p>
                            <p>© 2017 Katherine Lo.</p>
                        </div>
                        <div className='col-sm-7 hidden-xs'>
                            <h3 className='lead'><strong>MORE</strong></h3>
                            <p>You can reward me by <strong>WeChat</strong> or <strong>Alipay</strong> , thank you.</p>
                            <ul className='list-inline'>
                                <li><img src="./imgs/wechat.png" alt="wechat" style={{width: 100}} /></li>
                                <li><img src="./imgs/alipay.png" alt="alipay" style={{width: 100}} /></li>
                            </ul>
                        </div>
                    </div>
                </div>
            </footer>
        )
    }
}

export default Footer
/src/routes/articles/Articles.js
import React, { Component } from 'react'

import Nav from '../../components/Nav'
import Footer from '../../components/Footer'  //01. 引入Footer

class Articles extends Component {
    render() {
        return (
            <div>
                <Nav />
                <ul>
                    <li><a>第一篇文章</a></li>
                    <li><a>第二篇文章</a></li>
                </ul>
                <Footer />  //02. Footer组件插入
            </div>
        )
    }
}

export default Articles
再次刷新页面
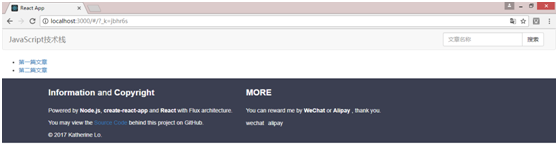
该有的都有了,
这个时候我们就觉得中间部分的文章列表看起来稍微简陋了一点儿,想要给它加一点儿CSS啊,好吧,我们就给他来加点CSS。
新建文件 /src/routes/articles/Articles.css
ul {
    background: red;
}
来一个假设,看看能不能引用成功
/src/routes/articles/Articles.js
import React, { Component } from 'react'

import './Articles.css'    //01. 引入CSS

import Nav from '../../components/Nav'
import Footer from '../../components/Footer'

class Articles extends Component {
    render() {
        return (
            <div>
                <Nav />
                <ul>
                    <li><a>第一篇文章</a></li>
                    <li><a>第二篇文章</a></li>
                </ul>
                <Footer />
            </div>
        )
    }
}

export default Articles
再次刷新页面
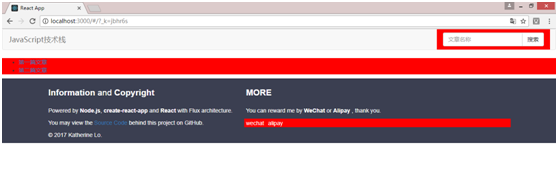
我们可以看到css文件已经成功应用到页面含有ul标签的各处
因此,现在我们可以在css文件内自由的写样式了 /src/routes/articles/Articles.css
.Articles-box {
  background: white;
  padding: 15px;
  margin-bottom: 80px;
  padding-bottom: 50px;
  box-shadow: 0 4px 10px rgba(0,0,0,.1);
}

.Articles-li {
    list-style: none;
    margin-top: 20px;
    line-height: 30px;
    border-bottom: 1px dashed #ddd;
}

.Articles-tag {
    margin-left: 3px;
}
import React, { Component } from 'react'

import './Articles.css'

import Nav from '../../components/Nav'
import Footer from '../../components/Footer'

class Articles extends Component {
    render() {
        return (
            <div>
                <Nav />
                <ul className="container Articles-box">  //01. 添加对应的class标签
                    <li className="Articles-li"><a>第一篇文章</a></li>  //01. 添加对应的class标签
                    <li className="Articles-li"><a>第二篇文章</a></li>  //01. 添加对应的class标签
                </ul>
                <Footer />
            </div>
        )
    }
}

export default Articles
再次刷新页面
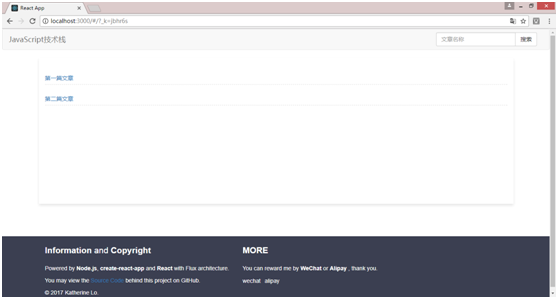
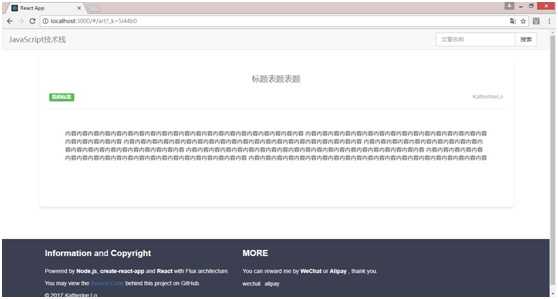
好了,第一个页面我们已经做好了,我们再用同样的方法创建第二个页面,也就是我们的文章展示页
/src/routes/art/Art.js
import React, { Component } from 'react'

import './Art.css'

import Nav from '../../components/Nav'
import Footer from '../../components/Footer'

class Art extends Component {
    render() {
        return (
            <div>
                <Nav />
                <div className="container Art-box">
                <header className="Art-header">
                    <p className="Art-title">
                        标题表题表题
                    </p>
                    <div className="clearfix">
                        <div className="pull-left">
                            <span className="label label-success Art-tag">我的标签</span>
                        </div>
                        <p className="pull-right Art-author">
                            KatherineLo
                        </p>
                    </div>
                </header>
                <p className="Art-body">
                    内容内容内容内容内容内容内容内容内容内容内容内容内容内容内容内容内容内容内容内容内容
                    内容内容内容内容内容内容内容内容内容内容内容内容内容内容内容内容内容内容内容内容内容

                    内容内容内容内容内容内容内容内容内容内容内容内容内容内容内容内容内容内容内容内容内容
                    内容内容内容内容内容内容内容内容内容内容内容内容内容内容内容内容内容内容内容内容内容

                    内容内容内容内容内容内容内容内容内容内容内容内容内容内容内容内容内容内容内容内容内容

                    内容内容内容内容内容内容内容内容内容内容内容内容内容内容内容内容内容内容内容内容内容

                    内容内容内容内容内容内容内容内容内容内容内容内容内容内容内容内容内容内容内容内容内容
                </p>
                </div>
                <Footer />
            </div>
        )
    }
}

export default Art
/src/routes/art/Art.css
.Art-box {
  background: white;
  padding: 15px;
  margin-bottom: 80px;
  padding-bottom: 50px;
  box-shadow: 0 4px 10px rgba(0,0,0,.1);
  min-height: 360px;
}

.Art-header {
    padding: 10px;
    border-bottom: 1px dashed #ddd;
}

.Art-title {
    font-family:"Microsoft YaHei",Arial,Helvetica,sans-serif,"SimSun";
    color: #6f6f6f;
    font-size: 20px;
    line-height: 50px;
    text-align: center;
}

.Art-tag {
    margin-right: 3px;
}

.Art-author {
    color: #aaa;
}

.Art-body {
    padding: 50px;
}
写好单纯的静态页之后,我想要来说一下我们即将要用到的flux框架,比如说我们的某个页面文件Articles.js,如果所有的动作包括点击或键盘抬起事件,发ajax请求,改变页面或组件数据,这些动作都在同一个文件,如Articles.js里实现的话,这个文件可能会变得非常的冗长,它可能不但需要表达页面结构(html)还需要表达页面逻辑(js)这样是非常不利于以后的文件维护的,这个时候如果我们可以把页面动作事件,ajax请求以及数据结构分开管理将会对我们的应用非常的有利。而flux就是来帮我们实现这件事的。
这时候我们需要用到alt这个包,这个包具体其实不用理解,只要知道它是来帮助我们粘合我们的action和store的就可以了。
npm install alt@0.17.1 --save
/src/routes/alt.js
import Alt from 'alt';

export default new Alt();
首先进入我们的列表页 /src/routes/articles/Articles.js 增加上一些我们需要用到这个框架的时候必须要的一些结构
import React, { Component } from 'react'

import './Articles.css'

import ArticlesActions from './ArticlesActions'  //01. 引入action和store文件(待会儿我们就会写这两个文件了,别着急)
import ArticlesStore from './ArticlesStore'

import Nav from '../../components/Nav'
import Footer from '../../components/Footer'

class Articles extends Component {
    constructor(props) {  //02. 一些绑定
        super(props);
        this.state = ArticlesStore.getState();
        this.onChange = this.onChange.bind(this);
    }

    componentDidMount() {  // 03. react自带的方法,当虚拟dom插入真实dom之后,store监听state的改变
        ArticlesStore.listen(this.onChange);
    }

    componentWillUnmount() {  // 04. react自带方法,当组件被卸载之后,解除监听
        ArticlesStore.unlisten(this.onChange);
    }

    onChange(state) {  //05. 当发生任何改变的时候,改变state
        this.setState(state);
    }

    render() {
        return (
            <div>
                <Nav />
                <ul className="container Articles-box">
                    <li className="Articles-li"><a>第一篇文章</a></li>
                    <li className="Articles-li"><a>第二篇文章</a></li>
                </ul>
                <Footer />
            </div>
        )
    }
}

export default Articles
这次后面的这些注释看不懂也没什么关系,因为我自己也不是很懂,照抄就是了,除了action和store的的文件名之外,以上新增的内容在每一个同样担当的文件里都一模一样。
然后进入我们的action文件,这个action文件就是专门用于分发动作,以及如果需要发ajax请求,也可以放在这个文件里。 /src/routes/articles/ArticlesActions.js
import alt from '../alt';  //01. 引入刚才我们写的胶水文件

class ArticlesActions  //02. 创建一个actions类
{
    constructor() {
        this.generateActions(
            ''
        );
    }
}

export default alt.createActions(ArticlesActions);   //03. 粘在胶水上
然后再进入store文件,store文件不作多余的处理,只处理数据,而且store文件必须作为纯函数的处理器,任何包含异步的操作(比如发ajax请求,setTimeout等)都应该放在上面的actions里面,而不应放到store里来。 /src/routes/articles/articlesStore.js
import alt from '../alt'  //01. 同样引入胶水文件
import ArticlesActions from './ArticlesActions'  //0.2 也把刚才写的action文件引入进来

class ArticlesStore {  //0.3 创建一个store的类
  constructor() {
    this.bindActions(ArticlesActions)  //04. 绑定同名action文件
  }
}

export default alt.createStore(ArticlesStore);  //05. 使用胶水把store也黏住
store文件还可以进行一些数据的初始化,比如现在我希望文章列表在这里初始化一下
import alt from '../alt'
import ArticlesActions from './ArticlesActions'

class ArticlesStore {
  constructor() {
    this.bindActions(ArticlesActions)
    this.articles = [  // 将文章数据进行初始化
        {title: '第一篇文章', createTime: '2017-09-25'},
        {title: '第二篇文章', createTime: '2017-09-25'},
        {title: '第三篇文章', createTime: '2017-09-25'}
    ];
  }
}

export default alt.createStore(ArticlesStore);
这些初始化的数据,我们可以直接在页面展示 /src/routes/articles/Articles.js(这个时候文件也有点长,我就不全文件复制了啊,下面是其中一段)
    render() {
        return (
            <div>
                <Nav />
                {JSON.stringify(this.state.articles)}  // 我们先把数据取出来,确定一下数据已经被我们的页面拿到了。
                <ul className="container Articles-box">
                    <li className="Articles-li"><a>第一篇文章</a></li>
                    <li className="Articles-li"><a>第二篇文章</a></li>
                </ul>
                <Footer />
            </div>
        )
    }
回到浏览器看一下
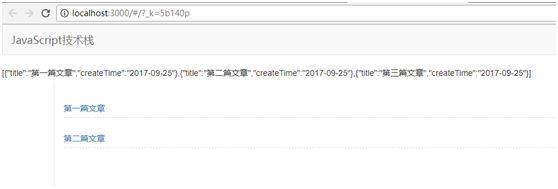
可以看到,刚才我们添加上去的初始化数据呢,已经被我们顺利拿到了,这个时候我们要做的就是把这些数据变成正常展示的页面。
    render() {
        return (
            <div>
                <Nav />
                <ul className="container Articles-box">
                    {this.state.articles.map(i => (
                        <li className="Articles-li"><a>{i.title}</a></li>
                    ))}  // 我们把刚才拿到的this.state.articles数组用map作一个循环(如果这里有任何理解难度的话,绝对是因为对map方法的不熟悉,请自行搜索map的使用方法),返回一个<li></li>,li的内容直接使用数组里的每个title(这里记得i.title要使用花括号括起来)
                </ul>
                <Footer />
            </div>
        )
    }
查看页面
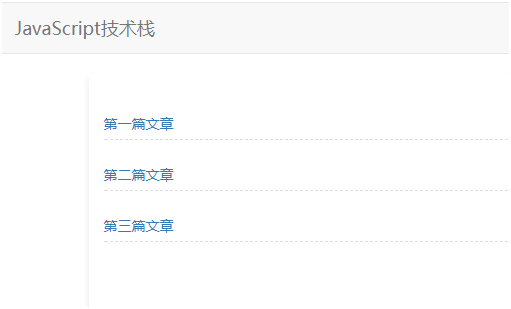
这时候可以看到,页面我们已经成型了。可是我又有点儿新的要求啊,我不想每次发表一篇新的博客就更新一次代码啊,累的慌啊,虽然说github的这个博客只支持静态页面,可以我还是有点儿想要直接拉取数据啊。好吧,满足你。
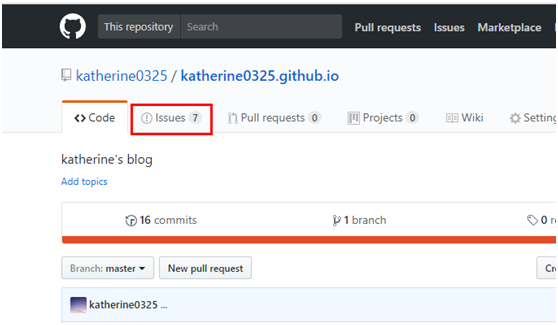
这个时候我们去我们之前建好的github仓库,

右下角,找到刚才建好的仓库点击进去(如果右下角没有那是你没有登陆啦,自己登陆去,右上角sign in)
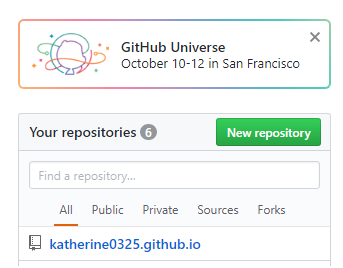
进到仓库之后,我们可以看到这个【issue】,我就企图在这里写我的博客,然后在个人博客的静态页面上向这个地址发请求,拉取我写的内容,这样想想是不是很不错叻,也就是说,这个静态页面的个人博客搭好之后,我们就可以不用理会它了,更新博客内容在这个issue里写就可以了,博客会自动拉取得。
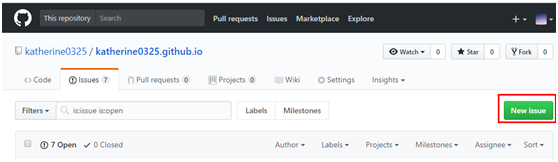
好,话不多说,点击issue进去
这里有一个按钮,是新建的意思,点击它
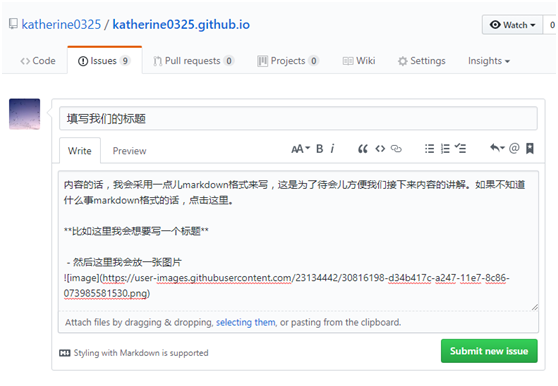
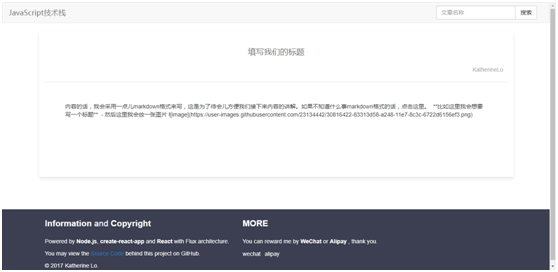
填写好标题和内容,然后提交(submit new issue)
tips:上面说的markdown格式文章 点这里
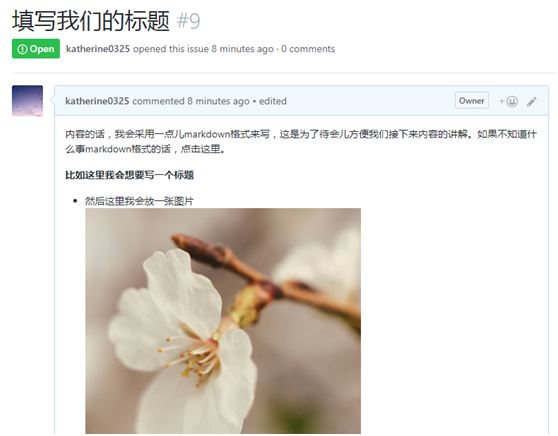
提交完之后长这样
写完文章之后,我们可以回到代码层级进行拉取了。
首先打开我们的页面文件Articles,我们知道componentDidMount是指react的虚拟DOM插入真实DOM之后执行的事件,所以,我们就在这个部分去写一个拉去文章列表的action /src/routes/articles/Articles.js
    componentDidMount() {
        ArticlesStore.listen(this.onChange);

        ArticlesActions.getArticles();  // 拉取文章列表的action
    }
然后打开文章列表页的action文件 /src/routes/articles/articlesactions.js
import alt from '../alt';

class ArticlesActions
{
    constructor() {
        this.generateActions(
            'getArticlesSuccess'    //03. 把想要执行的action名称填写在这里
        );
    }

    getArticles() {  //01. 新增获取文章列表数据方法
        fetch('https://api.github.com/repos/katherine0325/katherine0325.github.io/issues')
            .then(response => response.json())
            .then(data => {
                  //console.log(data)    可以直接在这里打印拉取到的数据
                this.actions.getArticlesSuccess(data);   // 02.把actions后面的名字(这个名字可以自己取)getArticelsSuccess填到上面的constructor里面
            })
            .catch(e => console.log(e.toString()))
    }
}

export default alt.createActions(ArticlesActions);
我们在action文件里新增一个ajax请求。我这里使用的是fetch,它跟jquery的
$.ajax({
    type: 'GET',
    url: 'http://xxxxxx'
}).done(function(data) {
    console.log(data)
})
是一样的,区别是,如果我这里使用ajax,我还得去安装jquery,但是fetch是javascript语法(es6)自带的请求方式,我就不多去装npm包了。
然后是fetch后面的这个地址 https://api.github.com/repos/katherine0325/katherine0325.github.io/issues 这个就是获取刚才我们新增文章列表的地址,解释来说呢就是 https://api/github.com/repos/<你的github用户名>/<你的博客地址(也就是 你的github用户名 + github.io)/issues
把我们拉取到的数据通过一个action分发给store /src/routes/articles/ArticlesStore.js
import alt from '../alt'
import ArticlesActions from './ArticlesActions'

class ArticlesStore {
  constructor() {
    this.bindActions(ArticlesActions)
    this.articles = [];   //01. 把之前初始化假设的文章内容删掉,留下一个空数组
  }

  onGetArticlesSuccess(data) {  //02. 添加一个方法,应为刚才添加的action同名,然后再同名名称前添加on,紧接着的字幕改为大写字母
    this.articles = data;  //03. 把刚才拉去到的文章数据添加到我们试验过初始化的store里。
  }
}

export default alt.createStore(ArticlesStore);
查看一下页面,已经成功展示我们拉取到的数据了。

鼓掌~~~ 很重要的步骤我们已经完成了哦 使用同样的方法,我们再次把文章也也完成
/src/index.js
import React from 'react';
import ReactDOM from 'react-dom';
import { Router, Route, IndexRoute } from 'react-router';
import registerServiceWorker from './registerServiceWorker';

import Articles from './routes/articles/Articles';
import Art from './routes/art/Art';

var Routes = (
    <Router>
        <Route path="/" component={Articles} />
        <Route path="/articles/:id" component={Art} />    //01. 修改了一下路由地址,为了匹配拉取文章对应的id
    </Router>
)

ReactDOM.render(Routes, document.getElementById('root'));
registerServiceWorker();
/src/routes/art/Art.js
import React, { Component } from 'react'

import './Art.css'

import ArtActions from './ArtActions'
import ArtStore from './ArtStore'

import Nav from '../../components/Nav'
import Footer from '../../components/Footer'

class Art extends Component {
    constructor(props) {
        super(props);
        this.state = ArtStore.getState();
        this.onChange = this.onChange.bind(this);
    }

    componentDidMount() {
        ArtStore.listen(this.onChange);

        //这个步骤是为了取得地址栏,例如:artcles/1。这个地址是依赖于上面我们所修改的路由地址得来的,地址栏的最后一个位置id就应该是我们所要拉去的文章的id。我们通过地址栏得到id之后,使用action getAtrId(articleId)把它发送给action文件
        var hash = window.location.hash;
        var index = hash.indexOf('?');
        var articleId = hash.slice(11, index);
        ArtActions.getArtId(articleId);
    }

    componentWillUnmount() {
        ArtStore.unlisten(this.onChange);
    }

    onChange(state) {
        this.setState(state);
    }

    render() {
        return (
            <div>
                <Nav />
                <div className="container Art-box">
                <header className="Art-header">
                    <p className="Art-title">
                        {this.state.title}   //把store的title内容放在这里
                    </p>
                    <div className="clearfix">
                        <p className="pull-right Art-author">
                            KatherineLo
                        </p>
                    </div>
                </header>
                <p className="Art-body">
                    {this.state.body}       //把store的body内容放在这里
                </p>
                </div>
                <Footer />
            </div>
        )
    }
}

export default Art
/src/routes/art/ArtActions.js
import alt from '../alt'

class ArtActions {
    constructor() {
        this.generateActions(
            'artIdSuccess'   //  别忘了这里要把action名称添加上来
        );
    }

    getArtId(id) {
        // 刚才页面文件发送的id就来到了这里,通过下面地址,加上id就可以拉去当前id对应文章的内容
        fetch(`https://api.github.com/repos/katherine0325/katherine0325.github.io/issues/${id}`)
            .then(response => response.json())
            .then(data => {
                // 得到内容之后,通过一个action artIdSuccess(data)把它发送给store文件
                this.actions.artIdSuccess(data);
            })
            .catch(e => console.log(e.toString()))
    }

}

export default alt.createActions(ArtActions);
/src/routes/art/ArtStore.js
import alt from '../alt'
import ArtActions from './ArtActions'

class ArtStore {
  constructor() {
    this.bindActions(ArtActions);
    this.title = "";
    this.body = "";
  }

  onArtIdSuccess(data) {
    // store文件获得了文章具体内容,把它赋给store的title和body。最后回到页面文件/src/routes/art/Art.js把title和body添加上
    this.title = data.title;
    this.body = data.body;
  }
}

export default alt.createStore(ArtStore);
好了,查看一下页面 localhost:3000/#/articles/1
好了,这个页面也成功了。
欸~~ 等一下,说好的图片呢,等等,还有我的格式啊,都不见了,缩成一坨字符串了我去……,这个时候,我们又要介绍一个新的npm包,marked,作用是把markdown格式转换为html格式,安装一下
npm install marked@0.3.6 --save
引入 marked,然后把this.state.body用marked包裹一下 /src/routes/art/Art.js
import React, { Component } from 'react'
import marked from 'marked'

import './Art.css'

    render() {
        return (
            <div>
                <Nav />
                <div className="container Art-box">
                <header className="Art-header">
                    <p className="Art-title">
                        {this.state.title}
                    </p>
                    <div className="clearfix">
                        <p className="pull-right Art-author">
                            KatherineLo
                        </p>
                    </div>
                </header>
                <p className="Art-body">
                    {marked(this.state.body)}
                </p>
                </div>
                <Footer />
            </div>
        )
    }
再次查看一下页面
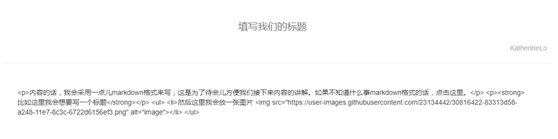
这……这……这,虽然html虽然出来了吧,但是是一堆html的字符串啊,哦对了,react为了安全起见,是不允许外部插入html的,所以所有引入的html都会以字符串的形式显示,我们可以使用react自带的dangerouslySetInnerHTML来完成这件事
/src/routes/art/Art.js
render() {
return (
<div>
<Nav />
<div className="container Art-box">
<header className="Art-header">
<p className="Art-title">
{this.state.title}
</p>
<div className="clearfix">
<p className="pull-right Art-author">
KatherineLo
</p>
</div>
</header>
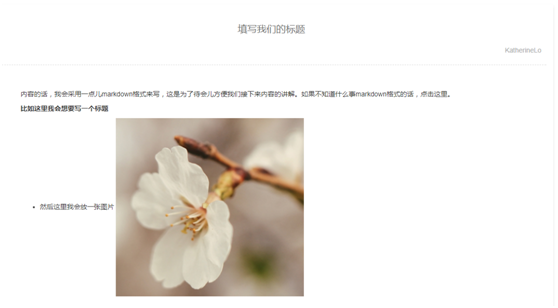
<div className="Art-body" dangerouslySetInnerHTML={{__html: marked(this.state.body)}}></div>
</div>
<Footer />
</div>
)
}
再次查看页面,好了。
最后我们在做一个把前面的列表页点击就能来到这个这个文章详情页的链接 /src/routes/articles/Articles.js
    render() {
        return (
            <div>
                <Nav />
                <ul className="container Articles-box">
                    {this.state.articles.map(i => (
                        <li className="Articles-li">
                            <a href={"#/articles/" + i.number} target="_blank">{i.title}</a>
                        </li>
                    ))}
                </ul>
                <Footer />
            </div>
        )
    }
现在我们就可以通过列表页点击进入详情页了
到现在为止,这个博客的代码已经完成了。接下来就是我们的结局,把我们写好的这个应用像之前的index.html单页面一样弄上我们的github仓库,让我们在网络上能够看到我们的应用。
进入/src/,右键打开git bash
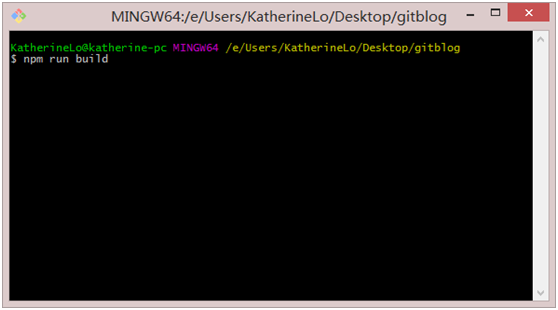
npm run build
run完之后长这样
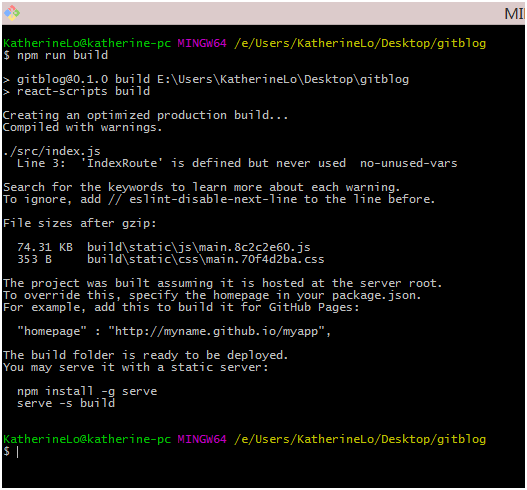
然后我们就可以看到/src/下多了一个build文件夹,进入这个文件夹
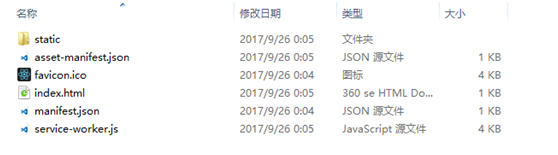
文件大概情况是这样的,记得最开始的那个试验吗,新增README.md文件
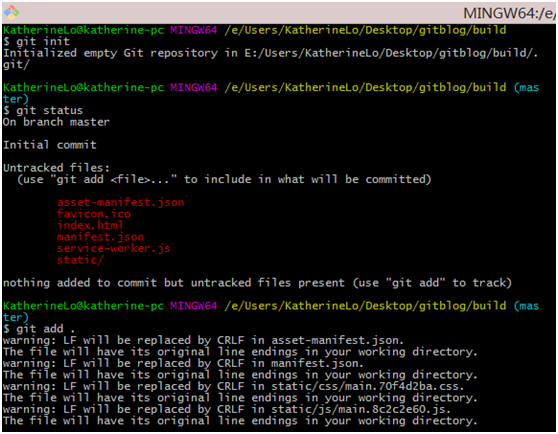
然后在这个文件夹里右键git bash 还记得我们最开始是怎么建立git仓库的吗,再来一次
//创建git仓库
git init
//查看仓库当前状态
git status
//添加所有文件进入缓存区
git add .
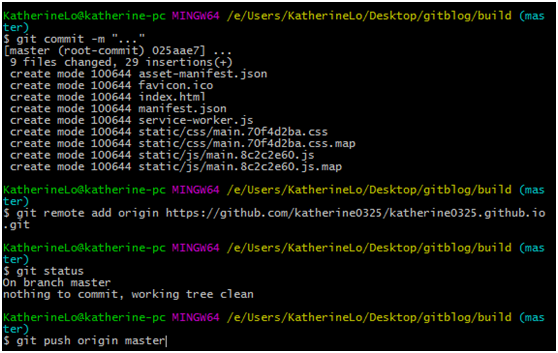
//提交所有文件
git commit -m "..."
//添加github远程仓库地址
git remote add origin https://github.com/katherine0325/katherine0325.github.io.git
//查看仓库当前状态
git status
//将仓库推送至远端
git push origin master
tips:这最后一步push的时候可能会失败,因为刚才我们已经push过一个index.html文件了,在没有拉取合并的前提下直接push我们新的应用内容的话会失败,所有可是采用
git push -f origin master
-f 表示强制推送(覆盖)
好了打开 katherine0325.github.io(把katherine0325换成你自己的github用户名),你就可以通过互联网看到你自己的博客,而且当你想要更新博客内容的时候,直接在issue上写博客内容,网站就会自动拉取了。
Happy Ending